Endeca Information Discovery Installation with WebLogic and Tomcat servers
Download the following packages from https://edelivery.oracle.com.
- Sun Java 6
- WebLogic Server
- ADF Runtime
- Oracle Endeca Information Discovery installation packages
- Oracle Endeca Information Discovery Studio (3.0) for Microsoft Windows x64 (64-bit) and Tomcat
- Oracle Endeca Information Discovery Provisioning Service (3.0) for Microsoft Windows x64 (64-bit)
- Oracle Endeca Server (7.5.1.1) for Microsoft Windows x64 (64-bit)
- Oracle Endeca Information Discovery Integrator (3.0.0.2) for Microsoft Windows x64 (64-bit)
- Oracle Endeca Information Discovery Sample Application (3.0) for Microsoft Windows x64 (64-bit)
Installing the Sun Java JDK
When you install the Sun Java SDK, you must install it to a path that does not have any spaces.
To install the Sun Java SDK:
1. Double-click the JDK installer file that you downloaded (jdk-6u43-windows-x64.exe).
The welcome page of the JDK installation wizard is displayed.
2. On the welcome page, click Next.
3. On the Custom Setup page, because the default installation location (under Program Files) has a space, you must change it here. To change the JDK installation location:
(a) Click the Change button.
(b) In the Folder name field, remove the Program Files directory. This changes the location to:
C:\Java\jdk1.6.0_43\
(c) Click OK.
(d) On the Custom Setup page, verify that the installation location has been updated, then click
Next.
4. The Destination Folder page sets the location of the public JRE. Because this JRE is not used by Endeca Information Discovery, you can leave the default directory. Click Next.
The installation process begins.
5. When the installation is completed, click Finish.
Installing WebLogic Server and ADF Runtime
Once you have the JDK installed, you can install WebLogic Server and ADF Runtime.
Installing WebLogic Server
After downloading the installation packages and installing the JDK, you next install WebLogic Server. Note
that this procedure only installs the minimum WebLogic Server configuration needed for Oracle Endeca
Information Discovery.
To install WebLogic Server:
1. From a command prompt, navigate to the directory where you placed wls1036_generic.jar.
2. To launch the installer, issue the following command:
java -jar wls1036_generic.jar
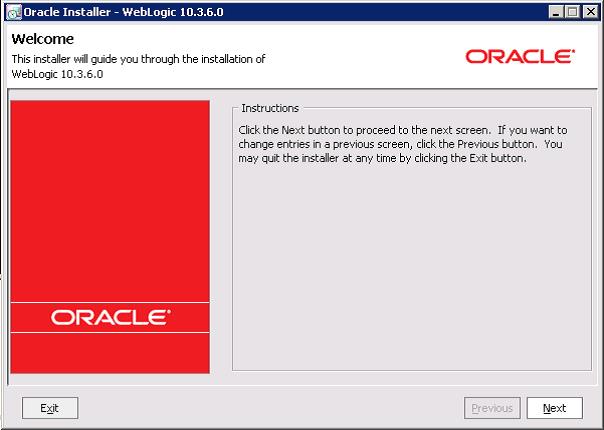
The Welcome page of the installation wizard is displayed.
3. On the Welcome page, click Next.
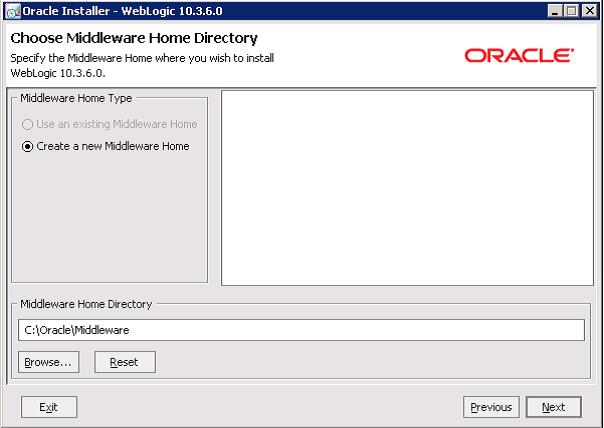
4. On the Choose Middleware Home Directory page:
(a) Click the Create a new Middleware Home radio button.
(b) Accept the default location for the Middleware Home Directory.
(c) Click Next.
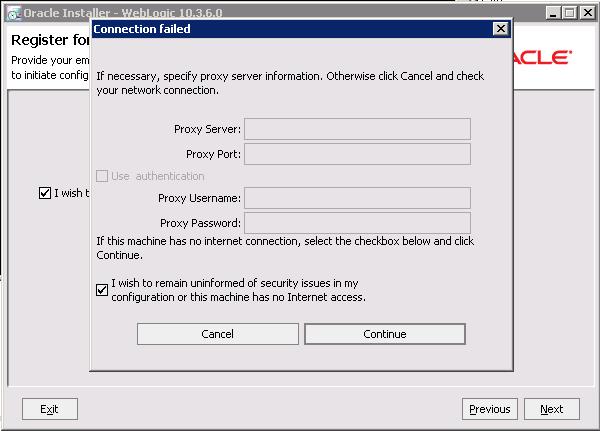
5. To bypass the Register for Security Updates page:
(a) Click Next without entering an email address.
(b) On the Email Address Not Specified dialog, click Yes.
(c) On the Are You Sure? dialog, click Yes.
(d) If the Connection failed dialog is displayed, check the I wish to remain uninformed of security
issues in my configuration or the machine has no Internet access checkbox, then click
Continue.
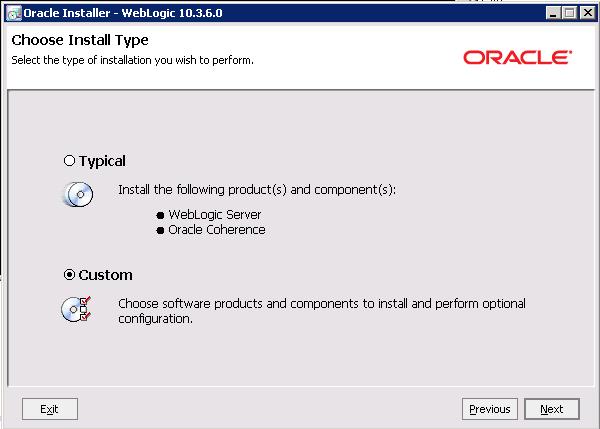
6. On the Choose Install Type page, click the Custom radio button, then click Next.
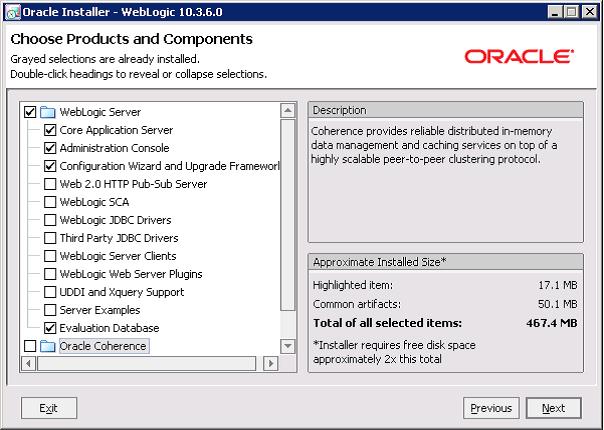
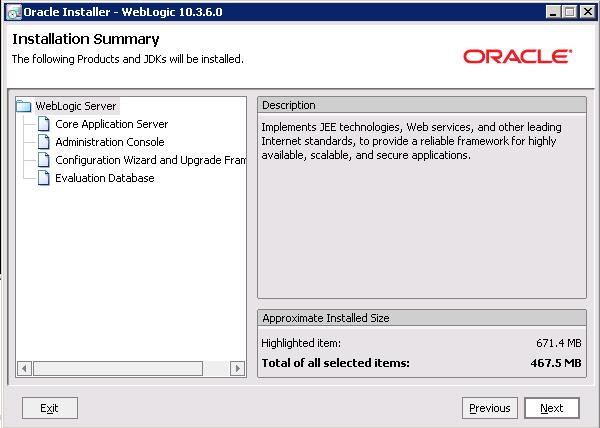
7. On the Choose Products and Components page, check the following products, then click Next:
• Core Application Server
• Administration Console
• Configuration Wizard and Upgrade Framework
• Evaluation Database
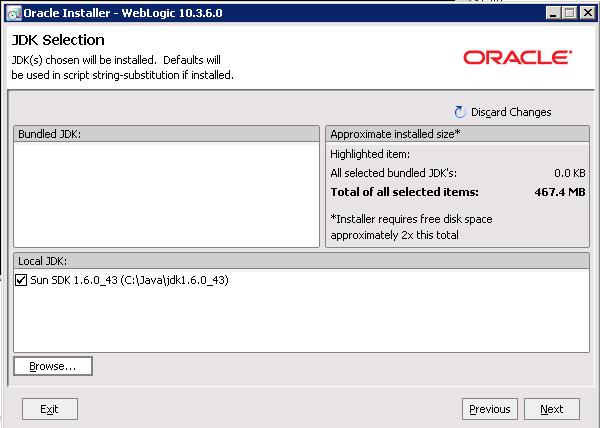
8. On the JDK Selection page, verify that the JDK you installed is selected. If it is, click Next.
If that version of the JDK is not selected:
(a) Under Local JDK, click the Browse button.
(b) Browse to and select the directory that contains the JDK (C:\Java\jdk1.6.0_43\).
The Local JDK section is updated to display the selected JDK with a checked box next to it.
(c) Click Next.
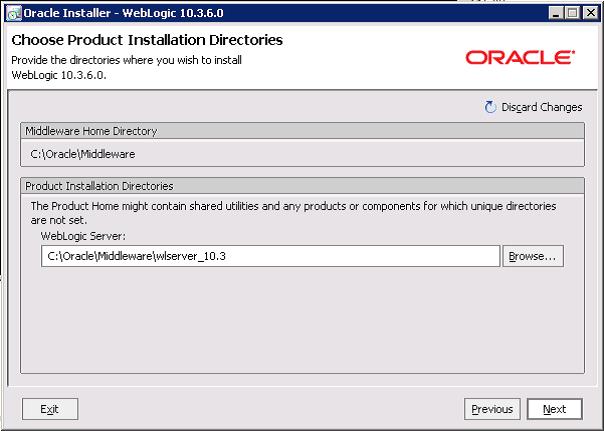
9. On the Choose Product Installation Directories page, accept the default installation directory, then
click Next.
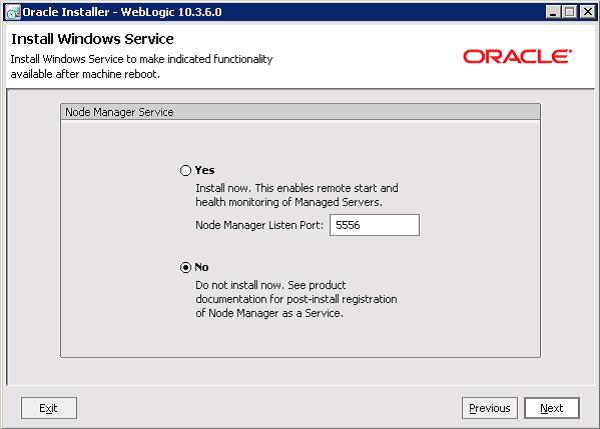
10. If the Install Windows Service page is displayed, click the No radio button, then click Next.
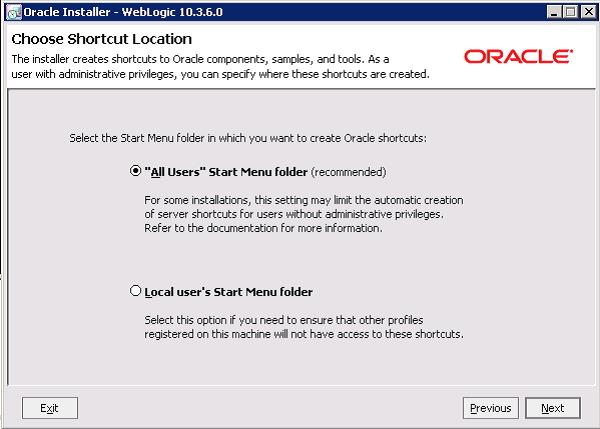
11. If the Choose Shortcut Location page is displayed, click a radio button to select the location of the
Windows shortcut, then click Next.
12. On the Installation Summary page, verify that you are installing the correct products, then click Next.
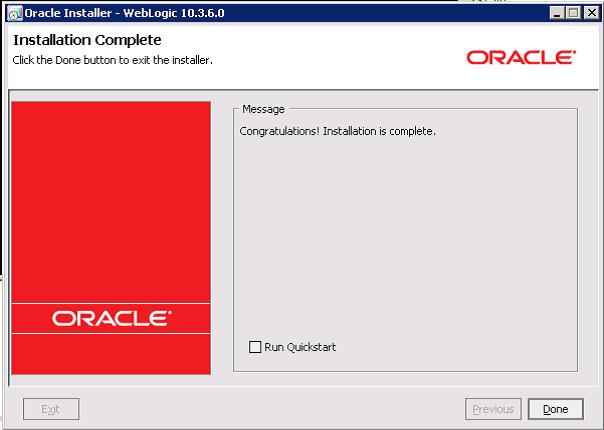
13. On the Installation Complete page, uncheck the Run Quickstart checkbox, then click Done.
An Oracle WebLogic shortcut is created in the Start Menu.
Installing Oracle ADF Runtime
After you install WebLogic Server, you next install ADF Runtime 11.1.1.6, which contains the JRF needed by Oracle Endeca Server.
To install Oracle ADF Runtime:
1. Unpack the ADF zip package (m_appdev_generic_11.1.1.6.0_disk1_of1.zip).
The package contains:
• readme.htm file
• Disk1 directory
• Disk2 directory
2. From a command prompt, change to the Disk1 directory.
3. Run the installer:
setup.exe -jreLoc <jre_location>
<jre_location> is the full path to the location of the Sun Java 6 JRE (Java Runtime Environment) that you installed. The JRE is located in the JDK installation directory.
For example:
setup.exe -jreLoc c:\Java\jdk1.6.0_43\jre
The Welcome page of the ADF installation wizard is displayed.
4. On the Welcome page, read the information, then click Next.
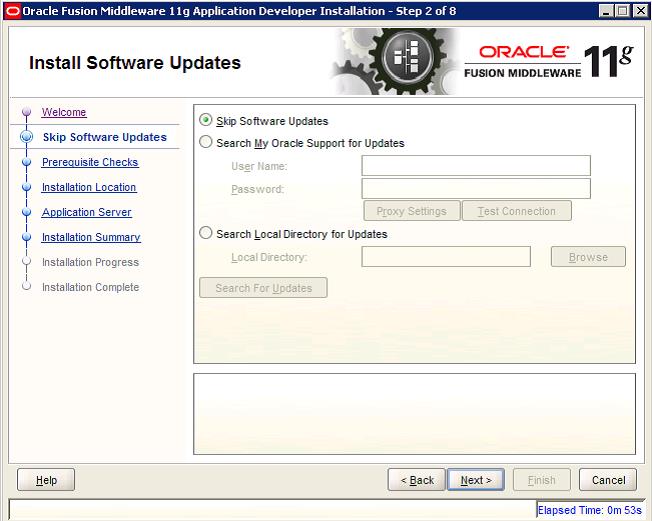
5. On the Install Software Updates page, click the Skip Software Updates radio button, then click Next.
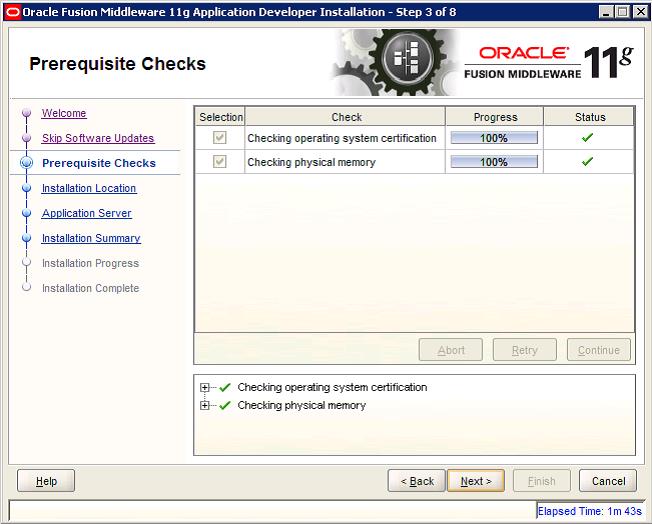
6. On the Prerequisite Checks page, wait until the installation process passes all the necessary checks.
If everything passes the checks, click Next.
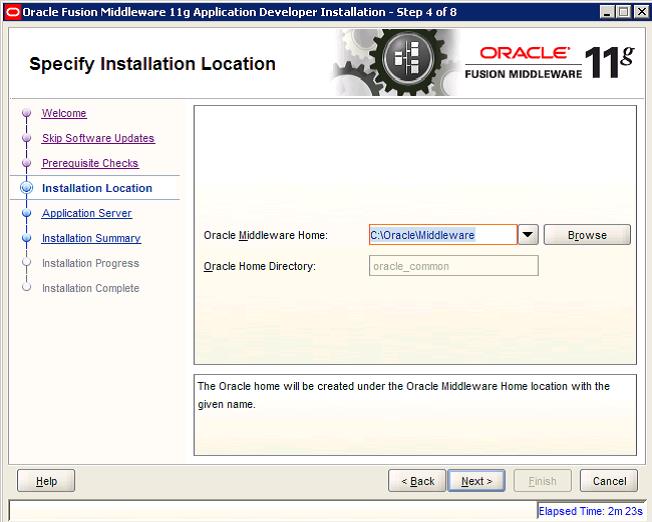
7. On the Specify Installation Location page, verify that the Oracle Middleware Home directory is the
location where you installed WebLogic, then click Next.
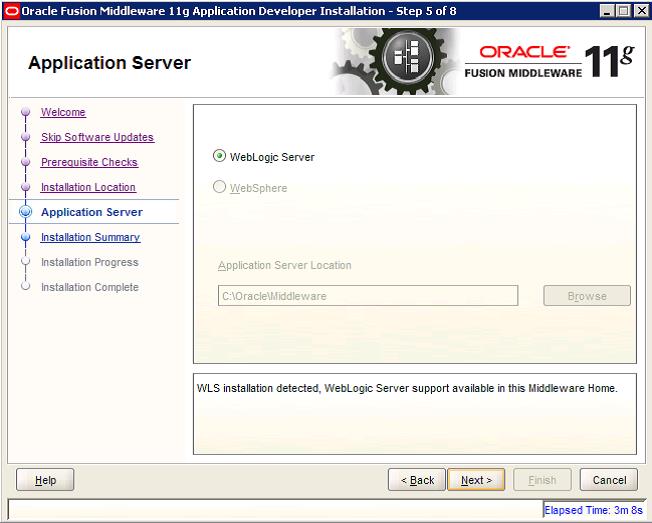
8. On the Application Server page, click the WebLogic Server radio button, then click Next.
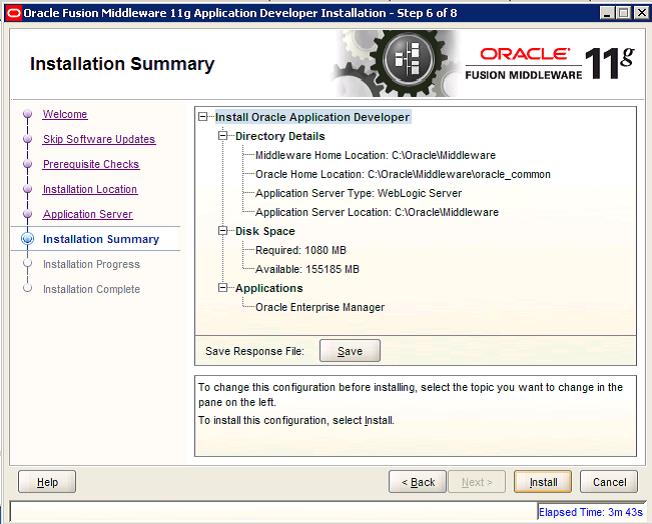
9. On the Installation Summary page, verify the installation details, then click Install.
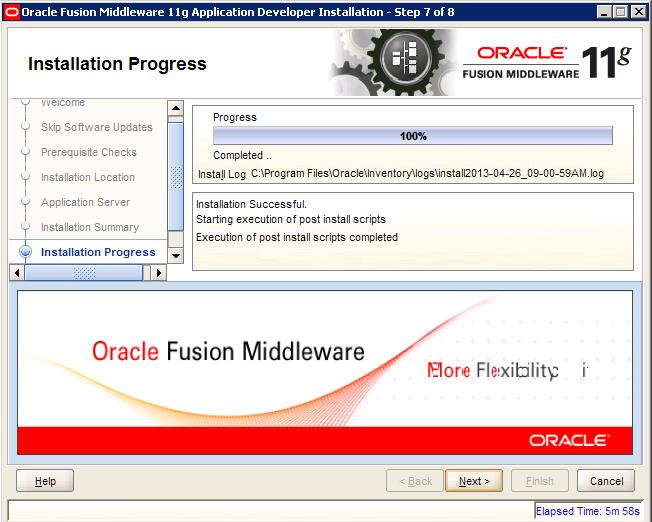
10. On the Installation Progress page, when the installation process has completed, click Next.
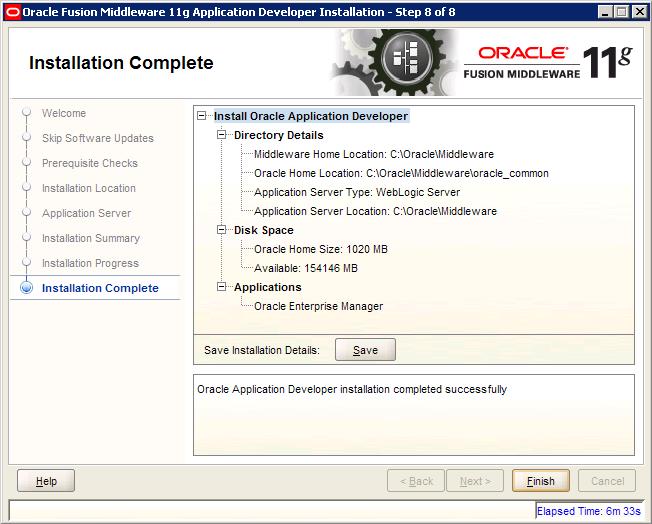
11. On the Installation Complete page, to exit the installer, click Finish.
Two shortcuts are created in the Start Menu:
• Oracle Application Developer 11g
• Oracle Common Home 11g
Installing Oracle Endeca Server
For Endeca Server, you first install the application, then create a WebLogic domain for it.
Running the Oracle Endeca Server installer
Next, you install the Oracle Endeca Server package.
To install Oracle Endeca Server:
1. Unpack the Endeca Server zip file to a temporary directory.
The resulting endecaserver directory contains a Disk1 subdirectory.
2. From a command prompt, change to the Disk1 directory, then run the installer:
setup.exe -jreLoc <jre_location>
<jre_location> is the full path to the location of the Sun Java 6 JRE (Java Runtime Environment) that
you installed earlier.
For example:
setup.exe -jreLoc C:\Java\jdk1.6.0_43\jre
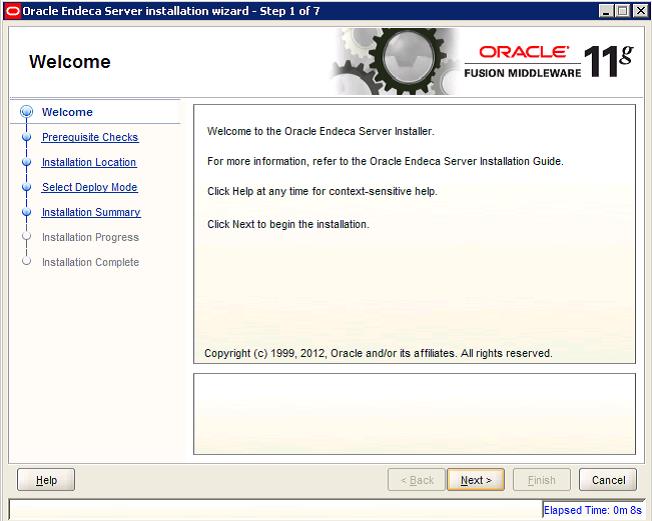
The installation wizard Welcome page is displayed.
3. On the Welcome page, read the information, then click Next.
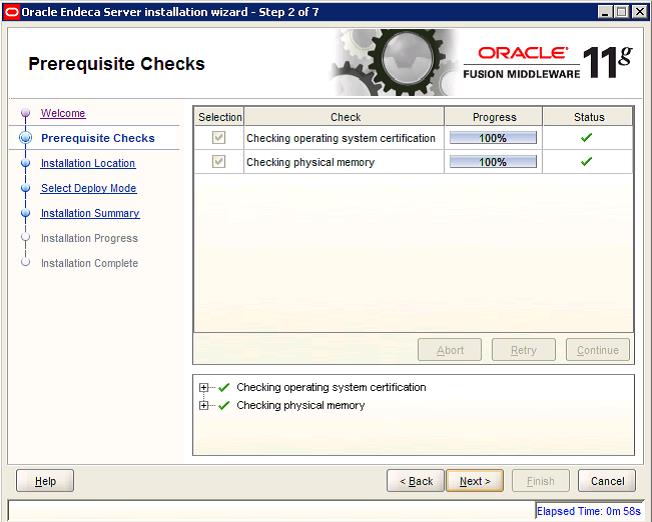
4. On the Prerequisite Checks page, if everything passes the checks, click Next.
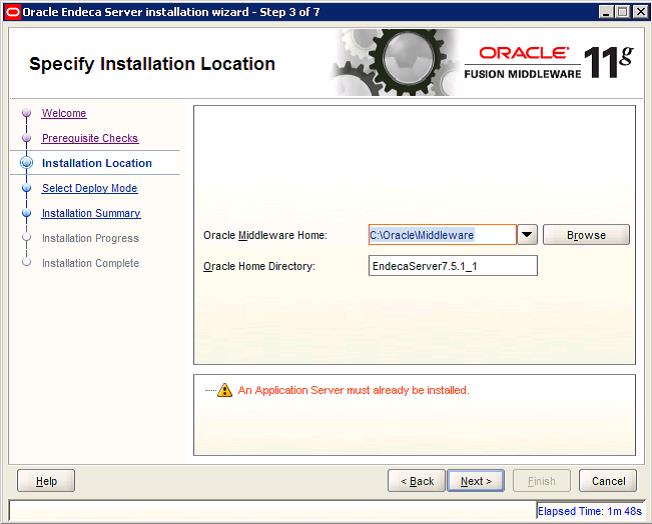
5. On the Specify Installation Location page:
(a) For the Oracle Middleware Home field, verify the name of the Oracle Middleware home directory.
(b) For the Oracle Home Directory field, accept the default Endeca Server home directory.
This is the root directory of the Endeca Server installation
(c) Click Next.
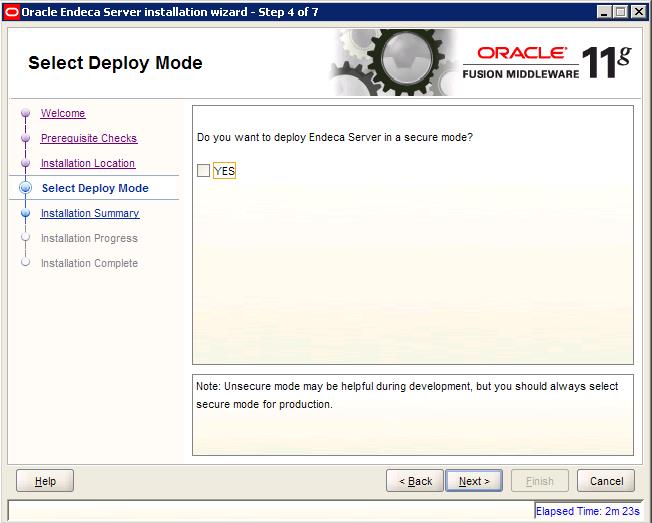
6. On the Select Deploy Mode page, uncheck the YES checkbox, then click Next.
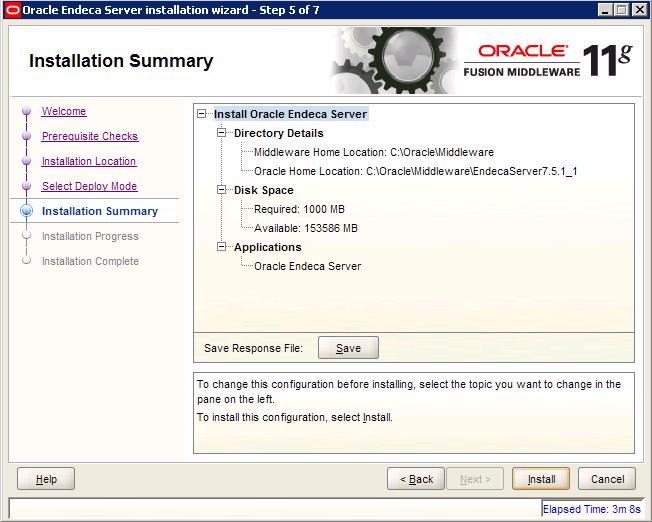
7. On the Installation Summary page, verify the installation details, then click Install.
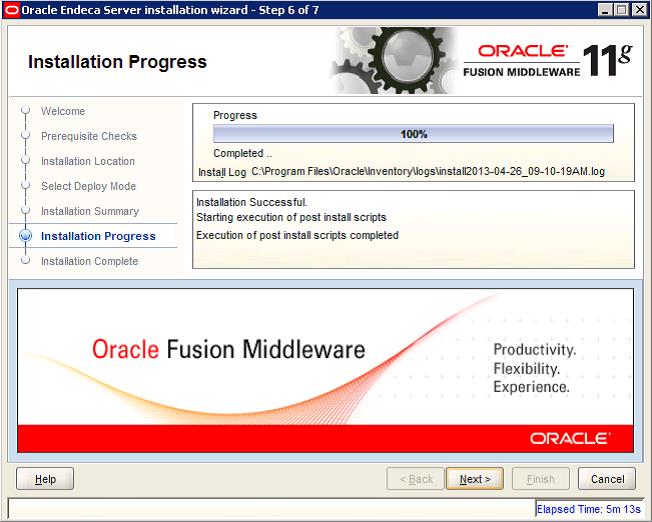
8. On the Installation Progress page, when the installation progress has completed, click Next.
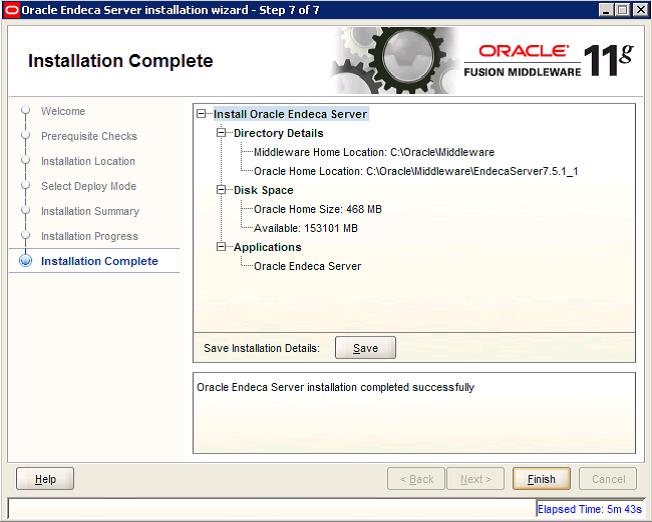
9. On the Installation Complete page, to exit the installation wizard, click Finish.
When the installation finishes, the Endeca Server files and directories are written to the Oracle Home
Location.
Creating the WebLogic domain for Endeca Server
The Endeca Server installation includes a WebLogic domain template that you use to create the Endeca
Server WebLogic domain.
To create the WebLogic domain for Endeca Server:
1. From a command prompt, change to the directory that contains the Configuration Wizard start-up program:
C:\Oracle\Middleware\wlserver_10.3\common\bin
2. To start the Configuration Wizard, run the following command:
config.cmd
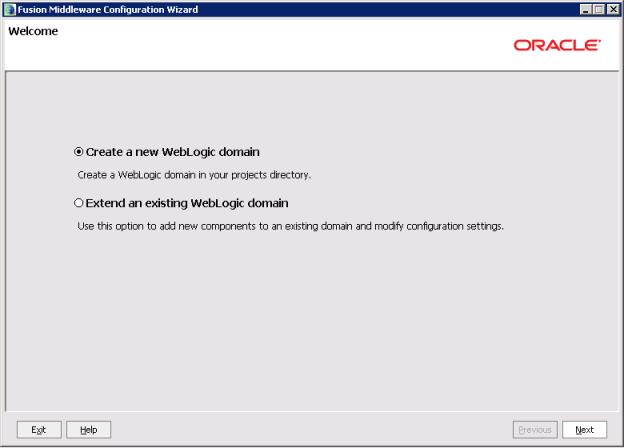
The Configuration Wizard Welcome page is displayed.
3. On the Welcome page, click the Create a new WebLogic domain radio button, then click Next.
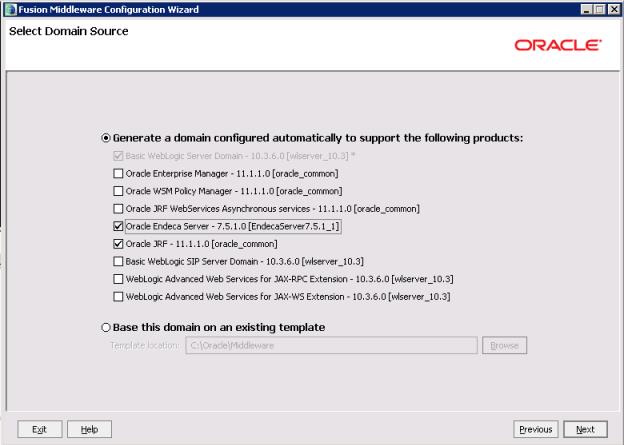
4. On the Select Domain Source page, check the Oracle Endeca Server checkbox.
The Oracle JRF checkbox is then checked automatically. Click Next.
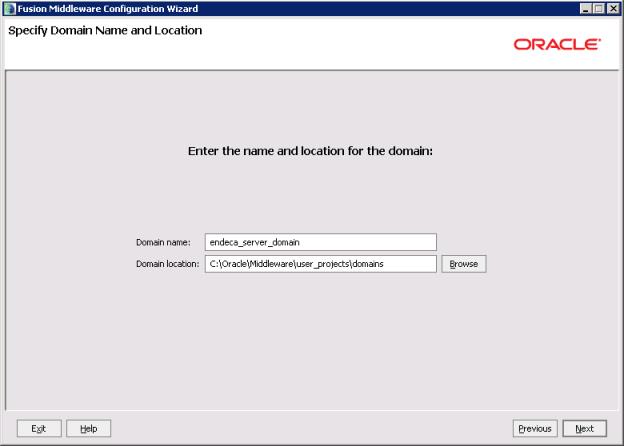
5. On the Specify Domain Name and Location page:
(a) Set the domain name to endeca_server_domain.
(b) Keep the default domain location.
(c) Click Next.
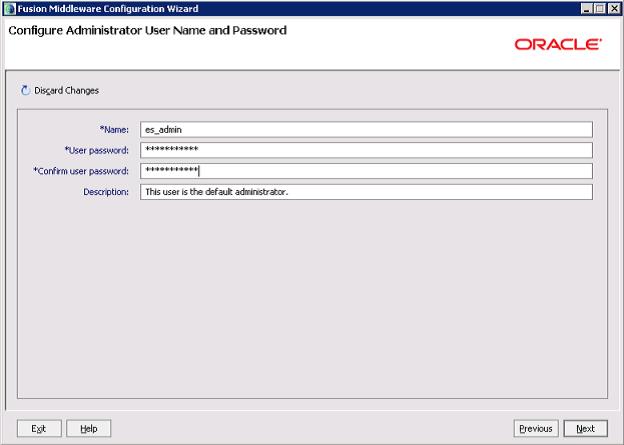
6. On the Configure Administrator User Name and Password page, to create the administrator
credentials for starting WebLogic Server:
(a) In the Name field, type the name for the new administrator user.
(b) In the User password field, type the user password.
The password must be at least eight alphanumeric characters long, and contain at least one
number or special character.
(c) In the Confirm user password field, retype the password.
(d) Optionally, in the Description field, type a description for the user account.
(e) Click Next.
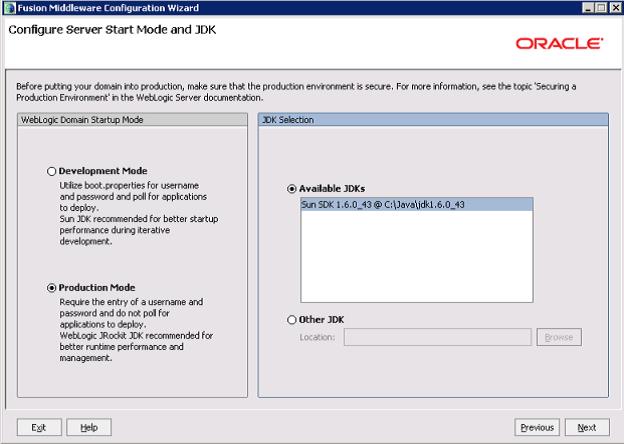
7. On the Configure Server Start Mode and JDK page:
(a) Under WebLogic Domain Startup Mode, click the Production Mode radio button.
(b) Under JDK Selection, click the Available JDKs radio button.
(c) In the JDK list, click the Sun Java SDK that you installed. If the Sun Java JDK is not displayed,
click the Other JDK button, and then browse for the Sun Java JDK home:
C:\Java\jdk1.6.0_43\
(d) Click Next.
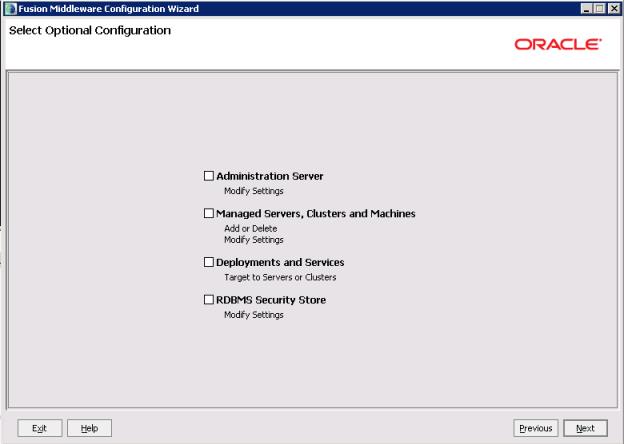
8. On the Select Optional Configuration page, do not select any optional configurations. Click Next.
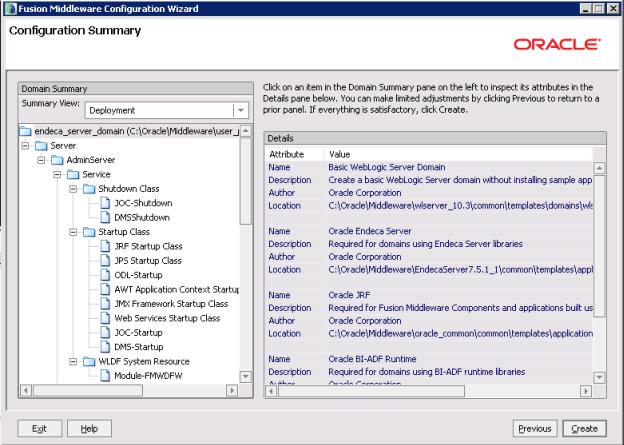
9. On the Configuration Summary page, to create the domain, click Create.
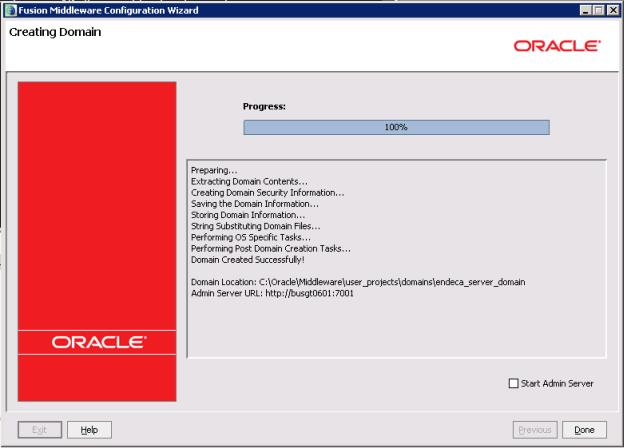
On the Creating Domain page, the message “Domain Created Successfully!” signifies the end of the domain creation process.
10. To exit the Configuration Wizard, click Done.
Verifying the Endeca Server deployment
After installing the Endeca Server, you should verify that the Endeca Server application was correctly
deployed.
To verify the Endeca Server application deployment:
1. To start the Admin Server for the Endeca Server domain, run
C:\Oracle\Middleware\user_projects\domains\endeca_server_domain\startWebLogi
c.cmd.
Alternatively, from the Windows Start menu, select Oracle WebLogic>User
Projects>endeca_server_domain>Start Admin Server for Weblogic Server Domain.
2. When prompted, enter the administrator user name and password for the Endeca Server domain.
3. From a Web browser, go to the Administration Server console at
http://localhost:7001/console.
4. On the Administration Console login page, log in using the domain administrator user name and
password.
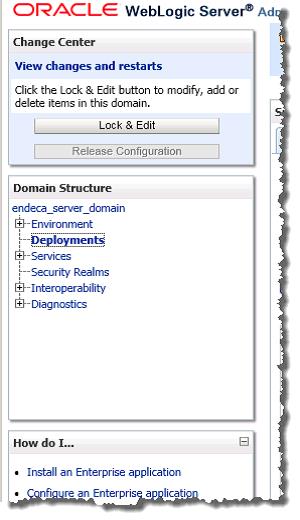
5. Under Domain Structure, in the endeca_server_domain tree, click Deployments.
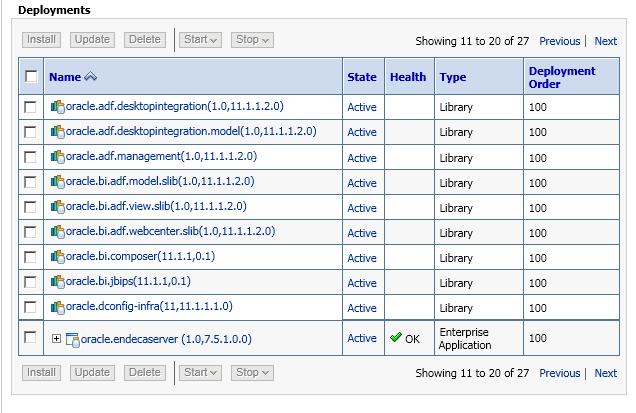
6. In the Deployments table, check the oracle.endecaserver Web application (on the second page of
the list).
Its State should be “Active” and its Health should be “OK”.
Installing Integrator
Integrator is installed as a machine-wide installation on Windows.
This type of installation requires administrator permissions and is used because it is intended for a production
environment. To complete this installation, you need the Integrator package you downloaded from the Oracle
Software Delivery Cloud.
To install Integrator on a Windows client:
1. From the Integrator package, extract EID_3.0_Integrator_designer.exe.
This is the Integrator installer file.
2. To start the wizard, double-click the installer file.
The wizard verifies the contents of the installation package.
3. To begin the installation process, click Next.
4. On the Copyright and Legal page, click Next.
5. On the Destination Folder page, accept the default installation directory, then click Next.
You must install Integrator into an empty directory.
6. On the Completing the Setup Wizard page, click Next.
The wizard begins to install the Integrator files.
7. When the wizard confirms that you have successfully completed the installation, click Finish.
8. After installation, to start the program, double-click the Integrator shortcut icon.
Installing Studio
Download the Oracle Endeca Information Discovery Studio (3.0) for Microsoft Windows x64 (64-bit) and Tomcat and unzip it in a folder
Starting Studio
Before you can explore the sample application, you must start the Studio server and log in to Studio.
Important: The Studio Chart component requires Adobe Flash Player 10.x. If you do not already
have Flash Player installed on your machine, you will need to download it from
http://get.adobe.com/flashplayer and install it before using Studio.
Note: This procedure assumes you installed the Studio Tomcat bundle.
To start Studio:
1. To start the portal’s Tomcat instance, run endeca-portal\tomcat-6.0.36\bin\startup.bat.
A command window opens, displaying log messages for the server start-up process. This process
takes several minutes to complete. When the server is started, you will see a message similar to this:
org.apache.catalina.startup.Catalina start
INFO: Server startup in xxxxx ms
Version 3.0.0 • March 2013
Important: Do not close the Tomcat command window at any point while you are using
Studio.
2. Once the server is started, open a browser and go to http://localhost:8080.
The Studio login page opens in the browser window.
3. Log in to Studio using the default login and password:
Email Address: admin@oracle.com
Password: Welcome123
You are immediately prompted to change the password upon first use. The new password must
contain:
• At least 6 characters
Oracle® Endeca Information Discovery : Getting Started Guide
Provisioning the Getting Started Application 13
• At least one non-alphabetic character
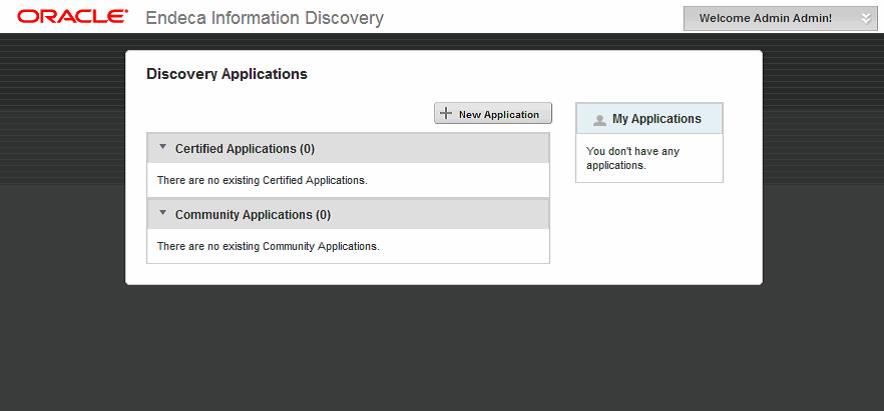
Studio opens the Discovery Applications page:




There are no comments yet.